Trezor.io/start – Your Simple Guide to Getting Started with Trezor Wallet
In the fast-moving world of cryptocurrencies, securing your digital assets is more important than ever. That’s where Trezor comes in. If you’ve just bought a Trezor device and are wondering what to do next, the best place to begin is Trezor.io/start.
This guide will walk you through the entire setup process—step by step—so you can store, send, and receive crypto safely.
What is Trezor?
Trezor is one of the world’s most trusted hardware wallets. Unlike online wallets or exchanges, a hardware wallet stores your private keys offline, keeping them out of reach from hackers.
There are two main models:
- Trezor One
- Trezor Model T
Both are small, secure, and easy to use. Whether you're a beginner or a seasoned crypto user, Trezor helps you take full control of your digital coins.
Why Start at Trezor.io/start?
The official setup page—Trezor.io/start—is the safest and most reliable way to begin using your Trezor wallet. You’ll find official instructions, security tips, and the download link for Trezor Suite, the companion app used to manage your crypto.
Important:
Never search for setup links on Google. Always go directly to Trezor.io/start to avoid fake websites or phishing attacks.
Step-by-Step Setup Process
Here’s how to set up your Trezor wallet from scratch:
Step 1: Unbox Your Device
Make sure the holographic security seal on the box is unbroken. If it looks tampered with, contact Trezor support before continuing.
Step 2: Visit Trezor.io/start
Open your browser and go to https://trezor.io/start. Choose your device (Trezor One or Model T) and follow the instructions.
Step 3: Download Trezor Suite
Trezor Suite is the desktop app that helps you manage your wallet. Download it only from the official site and install it on your computer.
Step 4: Connect Your Device
Plug your Trezor into your computer using the included USB cable. Open the Trezor Suite app.
Step 5: Install Firmware
If your Trezor is new, it will not have firmware installed. The app will prompt you to install the latest firmware. This step only happens once.
Step 6: Create a New Wallet
Once the firmware is ready, choose “Create new wallet.” You’ll be asked to write down your recovery seed—a 12- or 24-word phrase.
Important: Write it down on paper and store it somewhere safe. Never take a screenshot or save it on your phone or computer.
Step 7: Set PIN
Next, set a strong PIN code to protect your device. You’ll need to enter this PIN every time you connect your Trezor.
And that’s it—you’re ready to go!
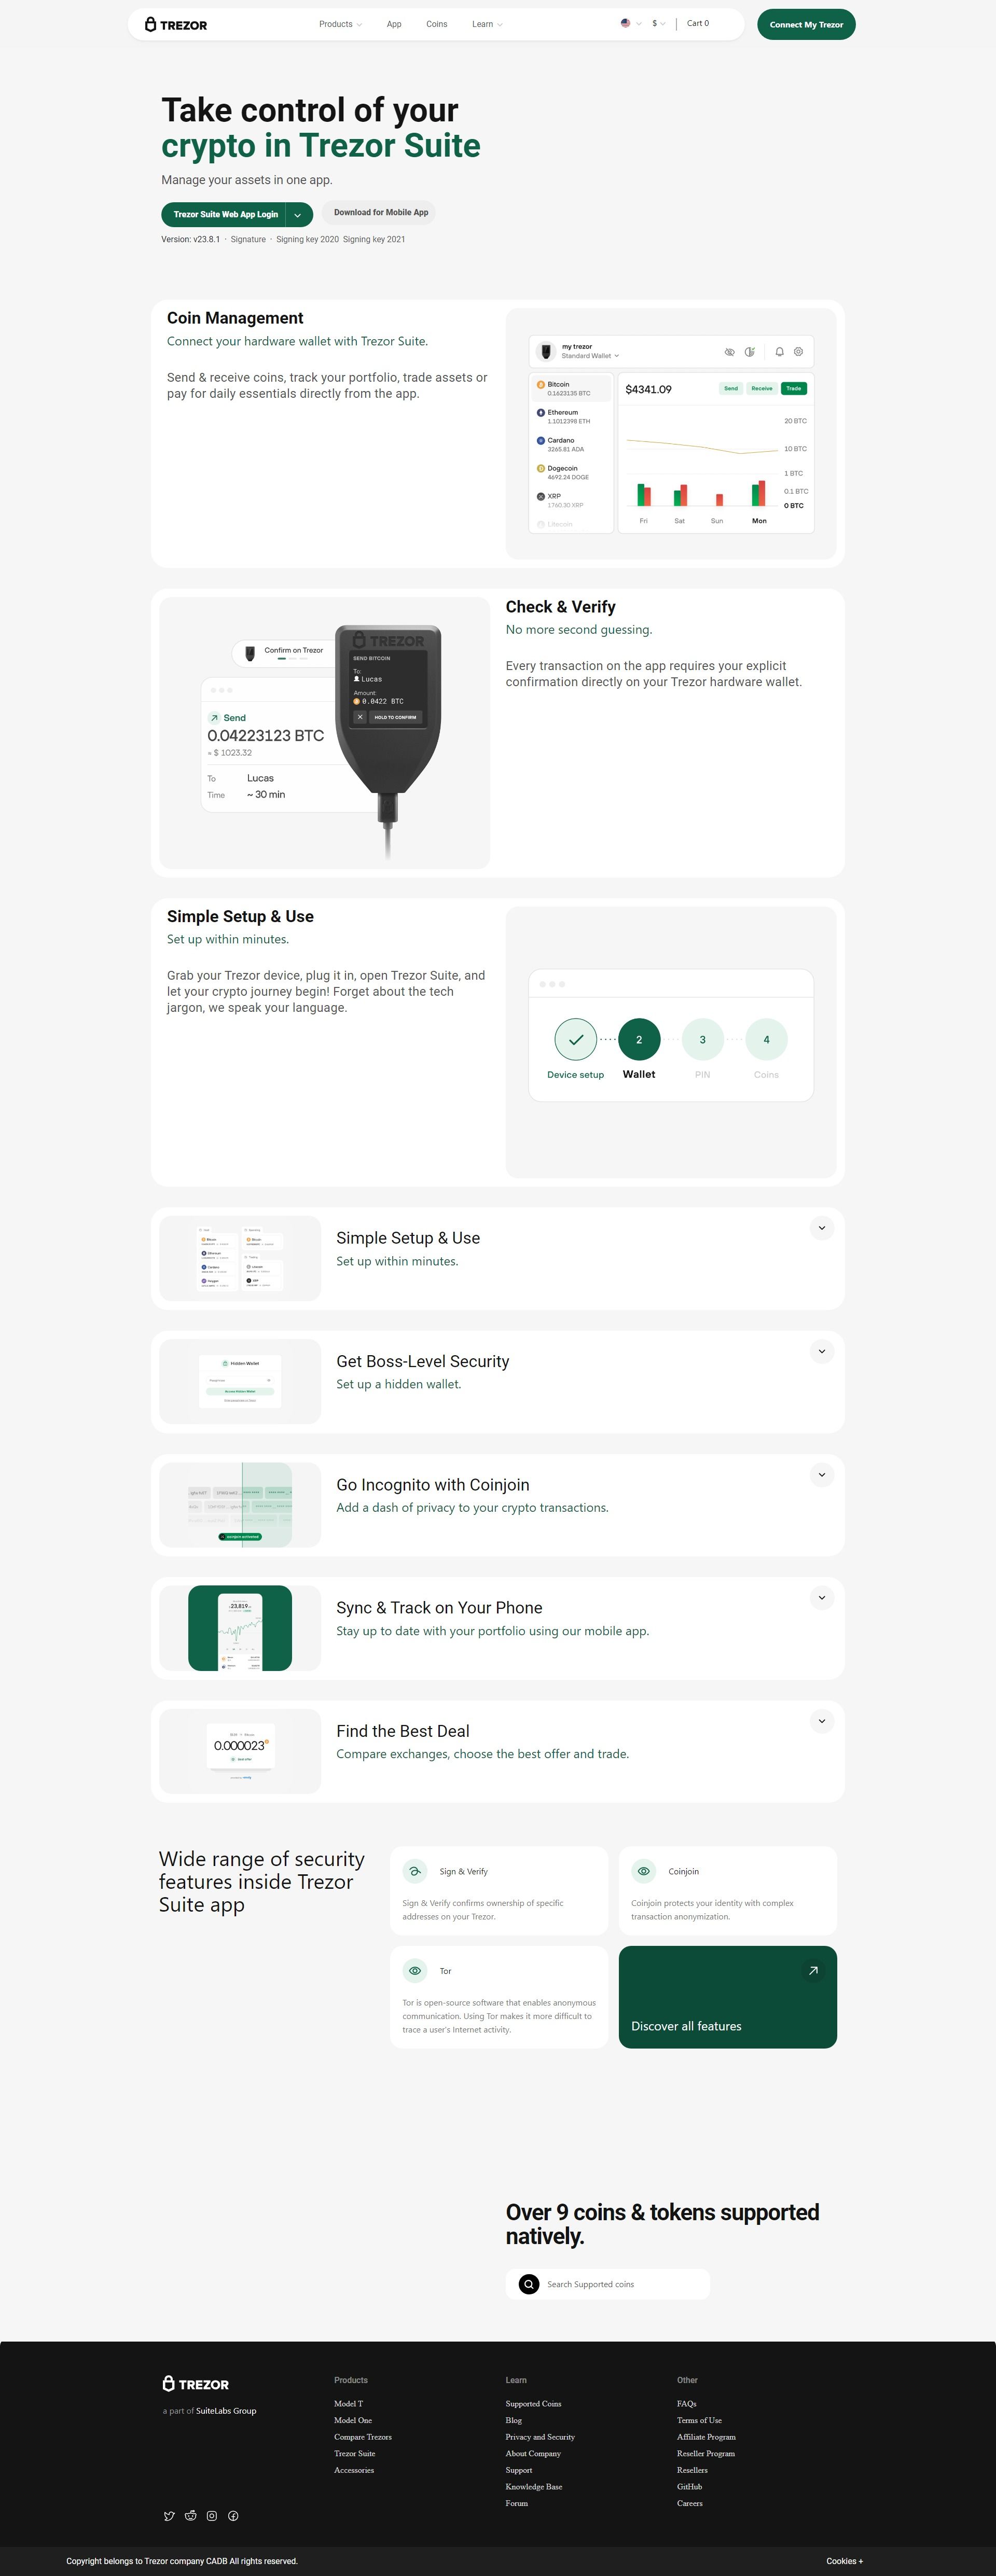
What Can You Do with Trezor?
Once your wallet is set up, Trezor Suite opens up a world of possibilities:
- Send and Receive Crypto: Easily transfer Bitcoin, Ethereum, and 1,000+ supported coins.
- Track Your Portfolio: View balances, recent transactions, and market values.
- Buy and Exchange: Use integrated services to buy or swap coins directly inside the app.
- Stay Private: Trezor Suite has built-in privacy tools, including Tor integration and coin control.
Why Trezor is a Smart Choice
Here’s why millions of users trust Trezor:
- Offline Storage: Keeps your private keys out of reach from hackers.
- User-Friendly: Simple interface, even for beginners.
- Open Source: Transparent and community-reviewed.
- Secure: Protected by PIN, passphrase, and recovery seed.
- Long-Term: Perfect for storing crypto for months or years.
Frequently Asked Questions
Q: What if I lose my Trezor device? No worries! As long as you have your recovery seed, you can restore your wallet on any new Trezor.
Q: Can I use Trezor on mobile? Currently, Trezor Suite is for desktop, but there are third-party mobile apps that work with Trezor Model T via OTG cable.
Q: Is Trezor Suite safe to use? Yes, as long as you download it directly from Trezor.io/start and keep your computer secure.
Final Thoughts
Setting up your hardware wallet might sound technical—but with Trezor.io/start, the process is surprisingly easy. In just a few minutes, you can take full control of your digital assets and enjoy peace of mind knowing your crypto is safe.
So if you’re ready to protect your investments, head over to Trezor.io/start and get started today!
Made in Typedream